7 Days to Die New Server Owner Guide
This Guide is the know-all be-all guide for your 7 Days to Die, Dedicated Server Client. By skimming through this guide, you will learn everything you need to know about your new GameServerKings 7 Days to Die Server.

Getting Started
How to Gain Access to TCAdmin
At GameServerKings, we like to make everything about your user experience quick, simple, and efficient. To do this, we employ the usage of the TCAdmin control panel.
To connect to your server via your control panel, navigate to manager.gameserverkings.com and log in with the information provided to you within your purchase verification email.
From here, you will have access to a slew of tools to help you administrate your server.
How to Find SteamID Information

Knowing your SteamID information is very important when administrating your server. Using a user’s steam name, in some cases, is not enough to verify the user isn’t another user who just changed their name.
To find your SteamID and SteamID 64, go to steamid.io and enter your steam community profile URL. Then, press "lookup." It will show you your Steam ID, SteamID3, SteamID64, and your custom URL. You can use this information to set up administrator accounts, issue user permissions, etc.
Getting To Know Your Server
Troubleshooting Startup Issues
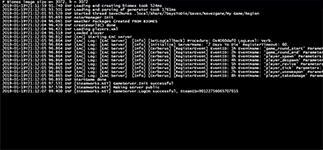
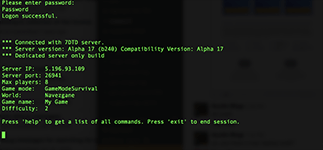
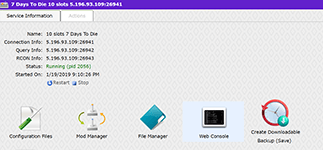 Troubleshooting Startup Errors is pretty simple with 7 Days to Die. All you must do is log into your TCAdmin Control Panel. Once there, navigate to your game service and then open your web console (left). Your web console will show any error which occurs.
A standard error that occurs from time to time is the Enlighten Error. This is caused by our system, which searches for the reason for the failure and notifies us.
Nine times out of ten, this will be caused by applying a steam update without backing up your configuration files. If this happens, look over your configuration files and ensure that everything is set up correctly.
Applying A Steam Update
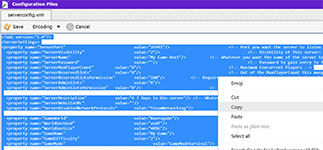 To update your version of 7 Days to Die, first, log in to your TCAdmin control panel. Go to your game’s service, then go to configuration files. From here, open your Serverconfig.xml file and be sure to back up its contents.
Occasionally, 7 Days to Die updates will cause your server’s main configuration file to break. We believe this is due to the steam validation install process. We have a backup process that will back up your files automatically when you update, but please manually backup your serverconfig.xml file before updating your server!
Once you have backed up your serverconfig.xml file, go back to your server’s TCAdmin control panel and click “Steam Update.” A pop-up window will appear, and your server will update to the latest stable branch build.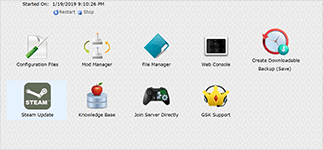
If you were sent to this section of this guide, you must reconfigure your server to how it was before your server broke after an update. If you can not do this, you will likely have to regenerate your Random Gen map. Sorry!
Connecting To Your Server For The First Time
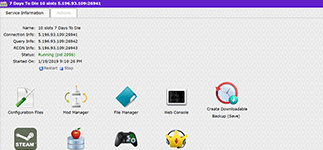
 To connect to your new 7 Days to Die server, you will want to note your connection IP and Port. You can find this in your billing panel and your TCAdmin User panel. A picture of where it is located from within the TCAdmin user panel is located on the left-hand side of this paragraph.
Once you have your login information, launch your 7 Days to Die game client from within Steam.
If you are not using Steam to connect to your 7 Days to Die server, or if you are EAC banned, you will need to disable EAC within your server configuration.
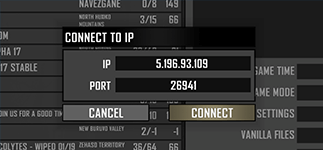
Once inside your 7 Days to Die Game Client, click “Join A Game” then, if your server is not available in your favorites or on the browser yet, click “Connect to IP….”
Enter your connection IP and Port which you noted down earlier. Click connect, and you’ll be in.
Server Configuration
How To Become A Server Administrator
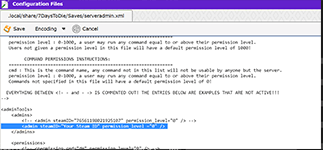
Becoming a server administrator within 7 Days to Die is simple. First, you must retrieve your Steam64 ID. Please refer to the section above in this guide about SteamID Information if you need it. Log into your TCAdmin Control Panel (Useful Links), go to configuration files, and open up your serveradmin.xml file.
From there, you will see a bit of default code written in between comments, and the example is shown below: <admins> <!-- <admin steamID="76561198021925107" permission_level="0" /> -->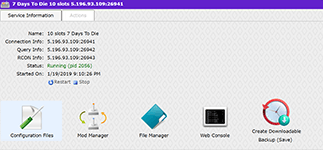
</admins>
To become an administrator, remove the comment syntax and insert your steam ID,
like so:
<admins> <admin steamID="76561198021925107" permission_level="0" /> </admins>
To add more administrators, simply add more within the admins' tag.
<admins> <admin steamID="76561198021925107" permission_level="0" /> <admin steamID="76561198021925107" permission_level="0" /> </admins>
It is essential to set your permission level to 0, as 0 gives you access to all commands ranked higher than 0. It sounds backward, but that’s how it is.
Server Command Permissions
To edit your command permissions, log into TCAdmin (Useful Links), go to your configuration files, and open your serveradmin.xml file. From there, you should see a list of admins, as well as a list of commands that users and admins can use. By default, you should have access to all commands which are not given to you by mods if you are permission level 0.
The way command permissions work for 7 Days to Die, the user must have an equal to or lower permission level than the command. Any player not given a specific permission level in your serveradmin.xml file will have a default permission level of 1000. This means any user can use the command "say", as it’s set to 1000. While, only users whose permission level is greater than or equal to 0 (by default, this can be changed) has access to cp.
How To Whitelist your server
To whitelist your server, simply log into TCAdmin, go to configuration files, then to serveradmin.xml. Within this file, you will have access to permissions, admin accounts, and more.
This is very important:
If you have even one user whitelisted on your server, this means your server is whitelist only. You must add all players who will play to your serveradmin.xml file manually.
To do this, simply scroll down to your <whitelist> section. By default, it will look like this:
<whitelist> <!-- <whitelisted steamID="" /> -->
</whitelist>
To whitelist users, simply remove the comments like so:
<whitelist> <whitelisted steamID="Steam64ID" /> </whitelist>
To add multiple users, add whitelisted steam id’s within the whitelist tag as shown:
<whitelist> <whitelisted steamID="Steam64ID" /> <whitelisted steamID="Steam64ID" />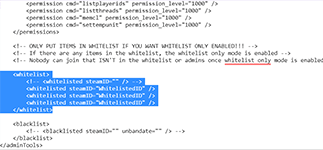
<whitelisted steamID="Steam64ID" /> </whitelist>
Alternatively, you can add yourself as a whitelisted user, then add users to the whitelist via the following console command:
whitelist add <PlayerName> <PermissionLevel>
Like so:
whitelist add Truwinna 0
You may access this command via Telnet or the in-game F1 console.
How To Ban Users
Banning users is very simple. Simply be logged in on an admin account in-game, or have access to telnet RCon and type the following command:
ban <PlayerName> <Duration> <UnitOfTime>
like so:
ban Truwinna 100 years
The unit of time value can be represented in minutes, hours, days, weeks, months, or years. To hard config a permanent ban, you can manually add it to your serveradmin.xml file. To access your serveradmin.xml file, log into TCAdmin, go to your game service, and click Configuration Files. From there, open serveradmin.xml with the text editor.
At the bottom of the page, you will see the following XML Elements:
<blacklist> <!-- <blacklisted steamID="" unbandate="" /> --> </blacklist>
To manually blacklist a user, change this section to look like this: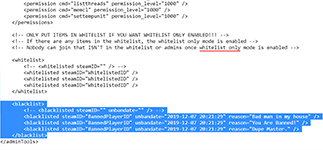
<blacklist> <blacklisted steamID="Steam64ID" unbandate="Year-Month-Day Hour(0-24):Minutes:Seconds" /> </blacklist>
You may also add a reason, like so:
<blacklist> <blacklisted steamID="Steam64ID" unbandate="2019-12-07 14:56:34" reason="You are Banned!" /> </blacklist>
The reason for the ban will be broadcasted to the user when they try to connect to the server.
To permanently blacklist a user, I recommend setting your unban date to any time in the year 3019. This will ensure that they are permanently banned.
How To Change Your Server Name & Description
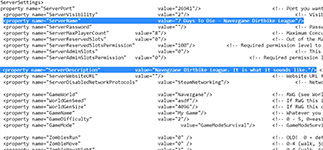
To change your server’s name and description, you will simply need to edit your serverconfig.xml file. To access your file, log in to TCAdmin, go to your game service, then to Configuration Files. Next, open serverconfig.xml with your text editor. To change your server’s name, change the value of the property “ServerName” like so:
<property name="ServerName" value="MyServerName"/>
To modify your description, edit the “ServerDescription” property value like so:
<property name="ServerDescription" value="MyServerDescription"/>
Be sure to leave this value within one line, as XML in this format cannot read new lines.
Map Options
To change your map options, you can also do this within your serverconfig.xml file. To edit this file, log in to TCAdmin, then go to your Configuration Files. From there, open serverconfig.xml with your text editor. The Default map settings will be seen below:
<property name="GameWorld" value="Navezgane"/>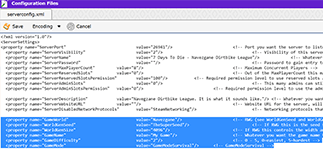
<property name="WorldGenSeed" value="asdf"/>
<property name="WorldGenSize" value="2048"/> <property name="GameName" value="MyWorld"/><property name="GameDifficulty" value="2”/><property name="GameMode" value="GameModeSurvival"/>
GameWorld
The game world property changes what map your server is using, you can choose from Navezgane, MP Wasteland Horde, MP Wasteland Skirmish, MP Wasteland War, and RWG. (RWG = Randomly Generated Map) An example of a randomly generated map Game World property is shown below:
<property name="GameWorld" value="RWG"/>
WorldGenSeed
The WorldGenSeed is exactly as it sounds. This value will become the seed for the randomly generated map. This will only change anything if your GameWorld property is set to RWG. An example is shown below:
<property name="WorldGenSeed" value="IceCap"/>
WorldGenSize
Similar to “WorldGenSeed” the WorldGenSize will change the size of your randomly generated map. This value works with WorldGenSeed to create the base seed of the server. This controls your height and width. This value has to be a number between 2048 and 16384. Keep in mind the larger the server is, the harder it will be on the machine. While in-game performance is not likely to suffer, login times and server reboots will take much longer. An example is shown below:
<property name="WorldGenSize" value="3455"/>
GameName
The Game Name value affects the save location of your server. This will be the name of your save folder. Interestingly enough, this value also affects decoration placing in your server. Trees and other entities for example. It does not affect the layout or topology of the map. An example is shown below:
<property name="GameName" value="MyWorld"/>
GameDifficulty
This is a number from 0 to 5 indicating 6 levels of hardness. Zero is easiest, 5 is the most challenging difficulty. A simple example is shown below:
<property name="GameDifficulty" value="3”/>
Game Mode
The GameMode option allows you to switch between GameModeSurvival and GameModeSurvivalMP. Simply enough, MP allows for building protection in a multiplayer environment. A final example is shown below:
<property name="GameMode" value="GameModeSurvival"/>
Telnet Setup
Short for Terminal Network, Telnet allows you to connect to your 7 Days to Die server on a remote connection. There are many ways to access your 7 Days to Die Remote Console. In this guide, we will cover three typical setups.
Finding Telnet IP and Port
To find your Telnet IP and Port is simple. All you must do is log into TCAdmin and go to your 7 Days to Die game service. From there, it will be listed next to your RCON Info. If it is not shown to you for some reason, your Telnet IP is the same as your connection IP. Your port will be two numbers higher than your connection port. For example, if your connection port is “26911” your Telnet port will be “26913”.
Setting up Telnet Password
Before we can begin, you must first set up your telnet password. Your connection address and port are already handled. To change your telnet password, log into Tcadmin. Go to your 7 Days to Die game service, and stop your server. Next, click on Configuration Files. From there, you can open your serverconfig.xml file with the text editor. Press ctrl+f and search for “TelnetPassword”. This should highlight your Telnet Password property. Change the default value to a new one. We suggest you use a password that is secure and easy to remember. An example of the Telnet Password property is shown below:
<property name="TelnetPassword" value="Password"/>
While you’re here, verify that the value for the property “TelnetEnabled” is set to “true”. If it is not, you will not be able to connect. Save your file, and start your server again.
PuTTY Configuration
 To connect to your server using PuTTY, first install PuTTY from their website. Open PuTTY and insert your IP in the Host Name (or IP address) box.
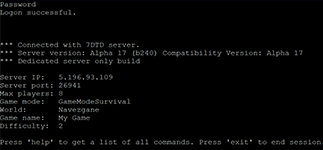 Next, place your Port inside the text box labeled Port, then verify your connection type is set to Telnet. After that, you may save this session if you like.
Simply name it under the “Saved Sessions” text box, then press Save.
Now you can connect. Click “Open” at the bottom of the PuTTY Client. A terminal window will appear. You should now be connected to the server, and it should be asking you for your password.
Please refer to the “Setting up Telnet Password” section of this guide for more information. Once you’ve entered your password, press enter. You will now be able to apply changes and stop your server from your Telnet client.
Windows 10 Telnet Client
Although this step requires you to go through more steps to connect, the advantage of using the Windows 10 Telnet Client to access your 7 Days to Die server is that you can connect from any Windows 10 computer. If you are out with some friends and a problem arises, you can simply set up the Windows 10 Telnet Client to run, and then you will have access to your server.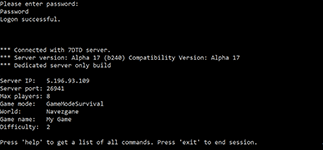
To enable the Windows 10 Telnet Client, please follow the steps on this Microsoft wiki article: Windows 10 Enabling Telnet Client.
Now that you have enabled your Telnet Client, simply open the windows command prompt by typing Windows Key + R. This will open a run window, type “cmd” to run the command prompt. From there, type telnet and hit Enter. You will now be in the windows telnet client.
Now that you have the telnet client open, simply type “o IP Port” This will open a connection to the telnet server. An example would be “o 255.255.255.255 26913” Next, all that needs to be done, simply type in your password and press enter. Once complete, you will have telnet access to your server.
Linux Telnet Client
If you use Linux, you must first install the telnet package with the following commands:
Deb based distros, Ubuntu, Debian, Mint, Kali:
$ sudo apt install telnet
Rpm based distros, Fedora, CentOS, RHEL
$ sudo yum install telnet
Now that the telnet package is installed, simply input the following into your terminal:
$ telnet IP Port
An example,
$ telnet 255.255.255.255 26913
You will now be connected to your telnet session. Simply provide your password, and you will have successfully logged in to your 7 Days to Die Telnet-based remote console.
Mac Telnet Client
To connect to your 7 Days to Die Remote Console via Telnet is relatively simple. Simply open your terminal by opening “Applications” then “Utilities” lastly, “Terminal”
Type the command “telnet IP Port” and press enter. An example is shown below:
telnet 255.255.255.255 26913
You should now be connected. Simply input your password, and you’ll be connected to your 7 Days to Die Remote Console on your Mac Terminal.
Thank you for reading this guide. If you need any help, please do not hesitate to reach out to us through a customer support ticket. If you are a customer of ours, all you need to do is log in to your client area, click on support, then make a new ticket. One of our representatives will be with you shortly.
Kind Regards from GameServerKings.
