
Valheim Server Setup Guide
Welcome to the Gameserverkings guide to getting started with your new Valheim server! In this guide you will see us refer to a "Management Panel", this can be found here.
Connecting To Your Server
From Valheim's main menu, click the "Join Game" tab towards the top. You will now be able to see a "Join IP" button, click this to open an input box. Add your server's IP:Port into this and then click "Connect" to join your server.
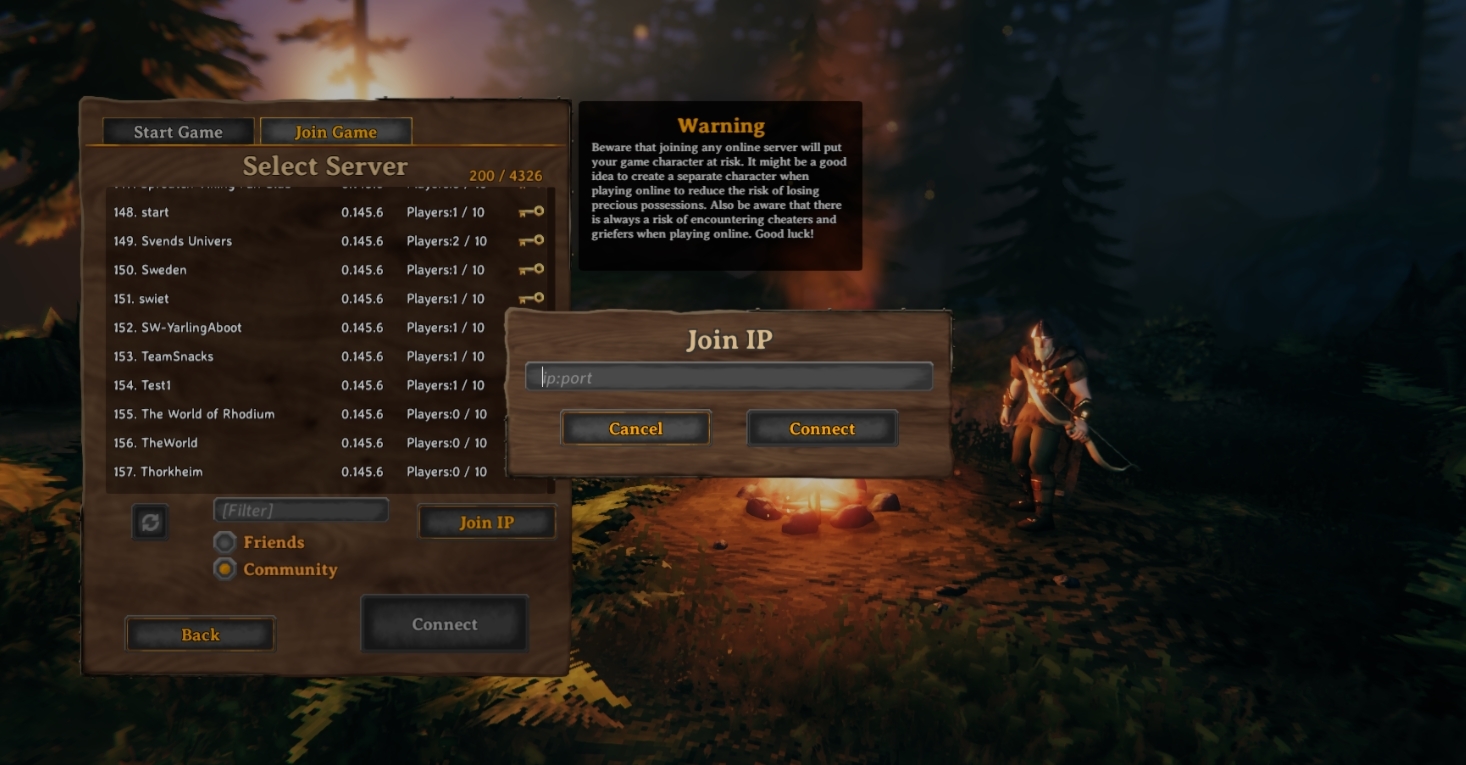
You can find your IP:Port in your Management Panel. It is labeled as your "Connection Info" as seen here:
![]()
So, for example, if you wanted to join this server you would enter: 104.129.133.119:2457
Server Administration
Finding Steam IDs
Valheim moderation systems are all based on user Steam 64 IDs. To find this, you can go to this website. Copy your Steam Profile URL into the box, click Lookup and it will provide you with some more information. The one you want is the “steamID64” number.
Formatting
The files mentioned below should be formatted as shown in this example screenshot.
Adding/Remove Admins
In your Management Panel click the Configuration Files button. Click the Text Editor button to the right-hand side of the “adminlist.txt” file.
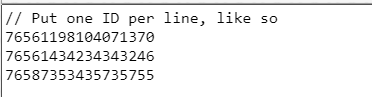
In this file, simply paste in the Steam 64 ID of the person(s) that you want to be an administrator on the server. Put them below the “// List admin players ID ONE per line” comment and make sure to only put one ID per line.
Once added or removed, save the file and restart the server to apply the new administrator list.
Check out our guide on Valheim Admin commands for more information about what Admins will have the ability to do.
Banning/Unbanning Players
In your Management Panel click the Configuration Files button. Click the Text Editor button to the right-hand side of the “bannedlist.txt” file.
In this file, simply paste in the Steam 64 ID of the person(s) that you want to be banned on the server. Put them below the “// List admin players ID ONE per line” comment and make sure to only put one ID per line.
Once added or removed, save the file and restart the server to apply the new ban list. Any ID listed on the ban list at the time of the server loading will not be able to connect to the server.
Managing Your Whitelist
In your Management Panel click the Configuration Files button. Click the Text Editor button to the right-hand side of the “permittedlist.txt” file.
In this file, simply paste in the Steam 64 ID of the person(s) that you want to allow to join your server. Put them below the “// List admin players ID ONE per line” comment and make sure to only put one ID per line.
Once added or removed, save the file and restart the server to apply the new whitelist. On top of needing the server password, any permission whose ID is not on the whitelist will not be able to join the server.
Commandline Options
Changing Your Server Password
Valheim requires a password for all servers, so by default we assign you a random one. This can be changed.
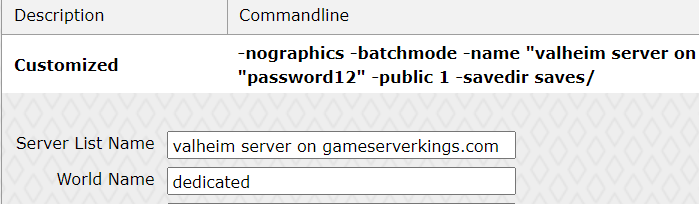
In your Management Panel, click the Commandline Manager button. From here, click the select button to the right-hand side of the commandline labeled “Customized”. This will open up a few fields for you to edit.
To change the password for your Valheim server, edit the “Server Password” field. Once you’re happy with your new password, click the Apply button to automatically restart your server and apply the new password.
Changing Your Server Name
In your Management Panel, click the Commandline Manager button. From here, click the select button to the right-hand side of the commandline labeled “Customized”. This will open up a few fields for you to edit.
To change the name that appears for your server in Valheim’s server list, edit the “Server List Name” field. Once you’re happy with your new name, click the Apply button to automatically restart your server and apply the new name.
Do not change the “World Name” option! This is for something different and may break your server if not changed correctly.
Transferring Saves
Uploading a save from another server or location is super easy to do. From your Management Panel, first make sure that your server is turned off.
Locating Your Local Saves
To find your local saves for Valheim, click the Windows button and search for the "Run" app. Open it and enter the following: %appdata%

Click OK to open the folder. Now navigate to the following directory to find your save files: \LocalLow\IronGate\Valheim\worlds
The full route to your save files is: C:\Users\%USERNAME%\AppData\LocalLow\IronGate\Valheim\worlds, however on most computers the AppData folder will be hidden by default, so it's easier to access this with the Run tool.
Copy all of the files inside of this directory (you can skip the "characters" folder, it's not needed) to your Desktop for easy access, then proceed to the next step.
Uploading Saves to Your Server
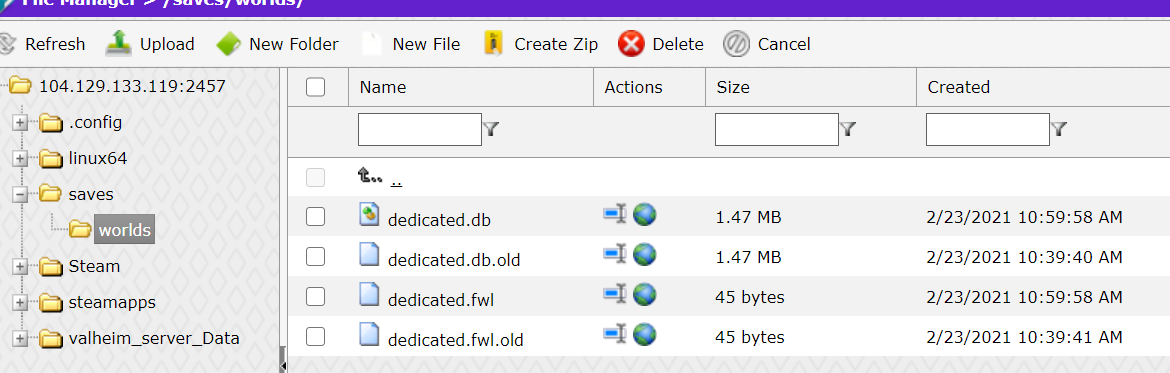
Then click the File Manager button to access all of your server files. Go to the “saves” folder, and then the “worlds” folder. Select all of the files in this folder (download them if you want to keep a backup!) and delete them. Use the Upload button towards the top left, then upload your files.
Changing Your Active Save File
This step can be skipped if the files are already named "dedicated", or if you rename them to "dedicated"! If you do not wish to do so, follow along with the rest of this tutorial to make sure you're loading the save file properly.
While still in your file system, note down the file name without the extension. For example if they are “mysave.fwl”, then just note down the “mysave” part.
Now exit your File Manager and click the Commandline Manager button. From here, click the select button to the right-hand side of the commandline labeled “Customized”. This will open up a few fields for you to edit.
Take the file name that we noted down a moment ago and add it to the “World Name” field here. Click Apply to automatically restart your server and load the new save files.